
How to Make Spatchcock Chicken

Spatchcock Chicken is the secret to getting a delicious whole roasted chicken on the table in under an hour. Dressed with herbs, garlic and copious amounts of olive oil, this chicken is full of flavor, juicy and has the most delicious crispy skin; all the things you want in a chicken without having to wait for an hour and a half to enjoy it. Have you seen those rotisseries that have potatoes underneath the birds getting soaked in the cooking juices? A few potato wedges (or your favorite low carb sub) underneath and you have a lemony, herby, chicken fat crisped side dish to go along with it.
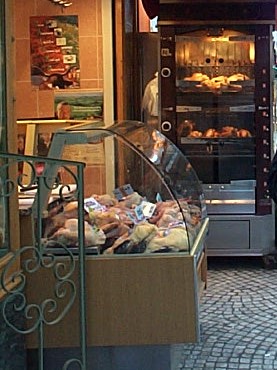
My favorite way to make a quick meal in Paris--Rotisserie Chicken and Potatoes. Spatchcock chicken gives you rotisserie results from your oven.
Tools for Spatchcocking
All you need for DIYing this chicken is a pair of sharp kitchen shears. Sometimes I have to use a sharp chef's knife to get through the very end of the chicken so maybe have that on hand, too. (A cleaver would work, too.) My favorite kitchen knives are from Ikea. They don't have to be expensive. In fact, my very expensive knife takes up drawer real estate and rarely gets used.
Ways to Flavor Spatchcock Chicken
You can certainly go basic with salt and pepper. I typically use my Magic Salt recipe when I'm wanting super low maintenance but not too plain. My recipe belwo follows the DIY path with a blend of herbs, garlic and lemon zest which is delicious and very summery.
Super Easy and Flavorful Spatchcock Chicken
I have recently found Oomph Seasoning blends which make flavoring any food even easier. Oomph blends are organically grown veggies that have been dehydrated and powdered to add nutrients and flavor to food. With these, salt and pepper you can go a thousand directions. Want fancy French, use their Duxelles blend. Feeling a little more exotic, go with Blend 5 which is Asian inspired with ginger, garlic and scallions. Southwestern or Mexican flavors come easily with the Sofrito Blend. For even more flavorful chicken without the DIY, simply mix two teaspoons of your chosen blend with salt and pepper into olive oil, ghee or butter and use as directed below.
How to Make Spatchcock Chicken
First off, let me just say, you don’t HAVE to cut the chicken up yourself. Ask your butcher in your favorite grocery store to do it for you instead. However, if you are not in an area with a good butcher shop, or you simply want to learn the method, follow these steps. It's only two cuts actually. Once you learn this technique, though, you will make this over and over again.

Step One: Turn chicken with backbone up.
How do you know which is the backbone side? It will be the one that is noticeably bonier. The breast side is noticeably rounded and meatier.

Step Two: Cut out the backbone.
Feel down the middle and find the right side of the backbone. Starting at the opening closest to you, cut right next to it all the way to the other end. You may have to put a little effort into it to get through the other end. This is where that sharp chef's knife or cleaver might come in handy.

Step Three: Remove Backbone.
Cut the other side exactly the same way and remove the backbone. If you see random bits inside the chicken rinse them out and dry well. Keep the backbone and neck if you have it for stock. Note: My chicken had the entire neck still attached so the backbone was extra long.

Step Four: Flatten the chicken.
Turn the chicken over with breast side up. Press down on the breastbone to break it--it's cartilage actually so not too hard. Turn the legs in so the drumsticks are next to the breasts (see photo.) Tuck the wings under the breast

Step Five: Flavor the chicken.
Mix together the olive oil with the flavoring agents (either the DIY version below or the Oomph version above.) Rub under the skin well then sprinkle liberally with freshly cracked pepper.

Step Six: Place on rack with or without veggies.
Place the chicken on a rack over a cookie sheet. Add potato wedges or any other veggies underneath the chicken so they will get flavored with chicken drippings. If you are using softer veggies like squash or peppers, wait until chicken has roasted 25 minutes.

Step Seven: Let it rest.
When the chicken is fully cooked, let it rest for 10-15 minutes before cooking. This allows the juices to redistribute and keeps the chicken juicy. If you have cooked veggies underneath, move the chicken over to a cutting board and cover with foil. Return the veggies to the oven to brown under the broiler.

How to Make Flattened Chicken without Spatchcocking
As previously mentioned, you can ask your butcher to do the spatchcocking for you. If you go this route, skip right to making the rub and massaging it into the chicken. Follow the directions from Step Five onward.

What to Serve with Spatchcocked Chicken
The best thing about roasting a chicken is letting potatoes of veggies underneath catch all the juices. Make sure you take this opportunity to make a super easy side dish. If you don’t eat potatoes, use squash, cauliflower, onions and peppers, fennel, broccoli, whatever you want. If you use winter squash, follow the same directions, but if you use any of the others, wait until the chicken has been in for 25 minutes before adding veggies.
I always serve this with some sort of salad to offset all the fatty goodness of roasted chicken. You can do a Greek salad as I have done here or you favorite salad recipe, but if you want to keep it really simple serve the chicken on a pile of arugula or mixed greens and use the pan juices for the dressing. Tuck in the potatoes or serve them on the side.

Spatchcock Chicken
Ingredients
- 1 whole chicken
- Fresh cracked pepper
- Rub Ingredients
- zest of two small lemons
- 1 ½ tbsp salt
- 2 tsp dried oregano
- 1 tsp red pepper flakes (optional)
- 5 large cloves of garlic
- 1 tbsp fresh rosemary (or 1 tsp dried)
- 2 tbsp olive oil
- Juice of the two small lemons, reserve lemon halves after squeezing
- 1 lb russet potatoes, cut into 8 wedges each
- 8 cups Mixed Greens or Arugula to Serve
Instructions
- Preheat oven to 450 degrees.
- Turn the chicken with the back facing up and the neck facing away from you.
- Cut along each side of the backbone to completely remove it and the neck.
- Turn the chicken over and press firmly on the breast bone to flatten completely. Press down on the legs if necessary to make the whole chicken about the same thickness across.
- Wash your hands thoroughly and mix together the rub ingredients in a small bowl.
- Lift the skin of the chicken and massage the rub into the flesh.
- Sprinkle the chicken with lots of black pepper and set on a rack that is on top of a large baking sheet.
- Tuck the potatoes underneath the chicken and throw in the lemon halves you reserved.
- Roast for 45 minutes or until the legs move away from the body easily.
- Remove the chicken to a cutting board and cover with foil.
- Remove the lemons from the baking sheet and toss the potatoes around in the juices a bit.
- Place under broiler to brown the potatoes.
- Remove the potatoes and stir lemon juice into the pan juices. Pour this mixture into a bowl.
- Cut the chicken into 6 pieces (2 leg quarters, 2 top breast halves with wing attached and 2 lower breast halves)
- Serve over greens with the pan juices and roasted potatoes